


A while ago, I had a discussion with a friend of mine about the importance of 2D sketches. Especially during the early stages of your level design blockout. What is the purpose of this 2D sketch, how long should it take and how do you know if it works in game? This article is a small insight on exploring a new workflow to combine both 2D and 3D methods.
"Sketch out your map layout in 2D, import it into Blender, click the create 3D blockout button and there you go! A playable representation of your level in mere seconds!"
Now I have a confession to make and that is that I don’t often sketch out 2D layouts with pen and paper. The reason is because I feel more comfortable writing down what I want to do and then quickly block it out in 3D. As I am pretty comfortable with Blender and in-engine blockout tools, I am able to visualize my ideas better. If I want to create a 2D layout later on, for documentation purposes or to show it to clients, I would make one deriving from the 3D blockout. This allows me to have a 2D layout that matches with what is seen in the game.
It felt more logical to me as I am really bad at drawing, I can’t draw to save my own life, and besides that, the only thing that mattered for me was that I was able to quickly visualize my ideas for others to understand what I was designing.
"You know what you're designing, but do others understand what you are trying to create?"
This is something that is very important, because to be able to convince others that your design is great, you will have to present and sell it. This is why the way you present things is important as well. Just imagine you are on SharkTank, trying to get investors to invest in your product. You might understand how genius your own idea is, but do the investors know that? They can’t look into your mind and the same goes for other people you share your work with. A rough 2D sketch with some scribbly text that reminds you of the handwriting of your doctor might look cool and it shows your process but for other people it will be difficult to understand and visualize how it would all work out.
"What if you are more comfortable sketching instead of modeling your layout?"
But my friend told me that not everyone is proficient in 3D and they feel more comfortable sketching it out on pen and paper. And yes, he does have a good point, it is actually pretty rare to be this bad at sketching 2D layouts like me. It got me thinking.
"Would there be a way you could convert your 2D sketches to 3D blockouts quickly?"
To answer this, yes, yes there is. I spent some time creating this workflow, creating a script to automate it and tested it out in the engine. I started with trying to understand what we want to get out of this. What I want in a workflow like this are 3 things, the ease of use, the time saving element and being able to make quick iterations. To go from a 2D sketch to this 3D blockout that you can playtest.
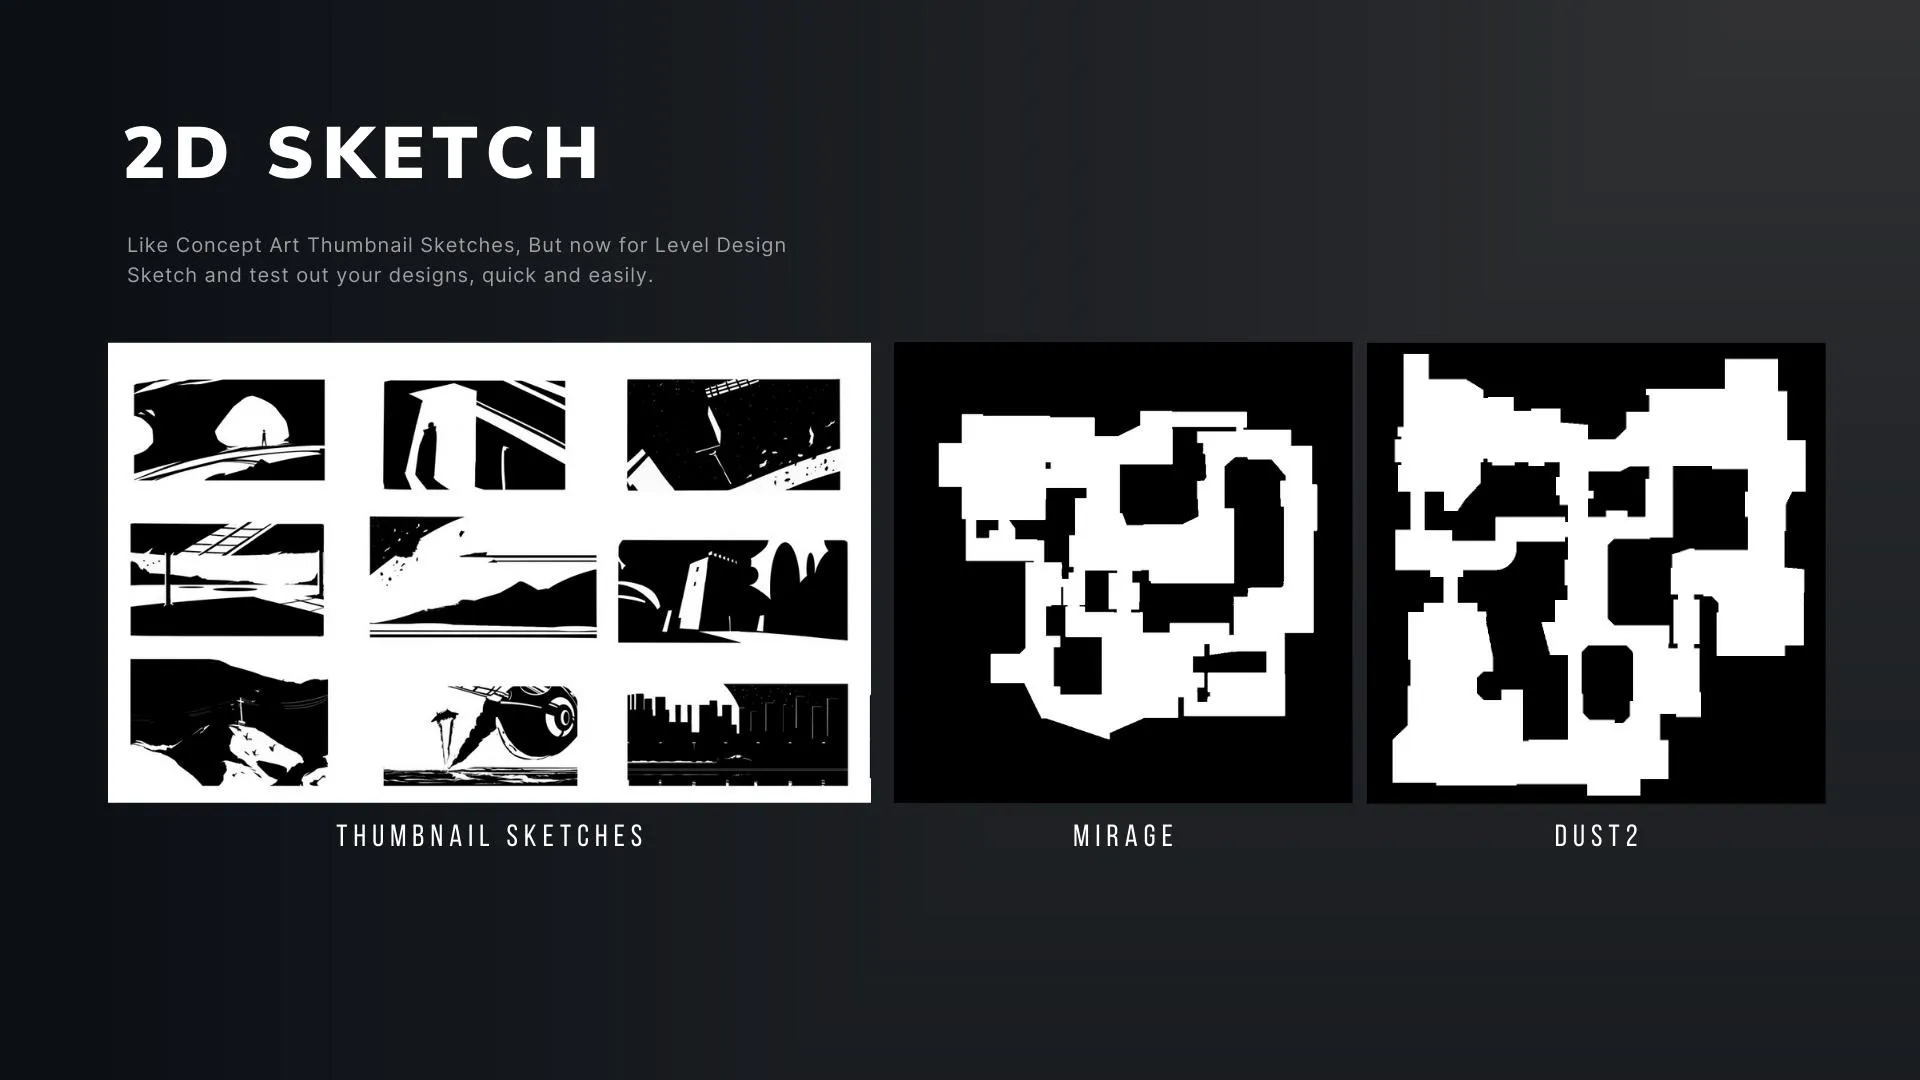
When I thought about this workflow I got inspired by how concept artists and storyboard artists create quick thumbnail sketches to visualize their ideas. They use big shapes and contrast to create a high volume of explorations, from which they could pick one of them or mix and match later on.
I believe we level designers can do the same and sketch out a bunch of layouts to try out different gameplay opportunities.
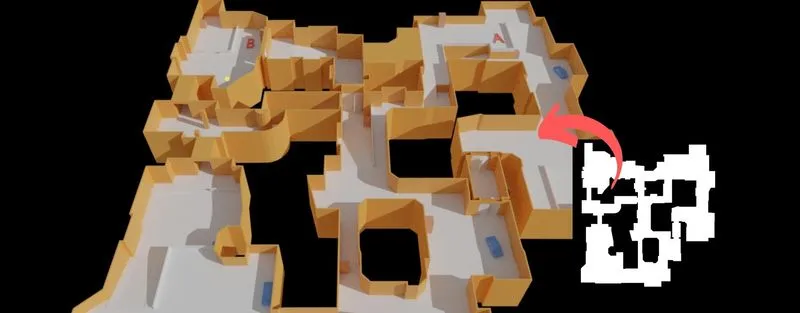
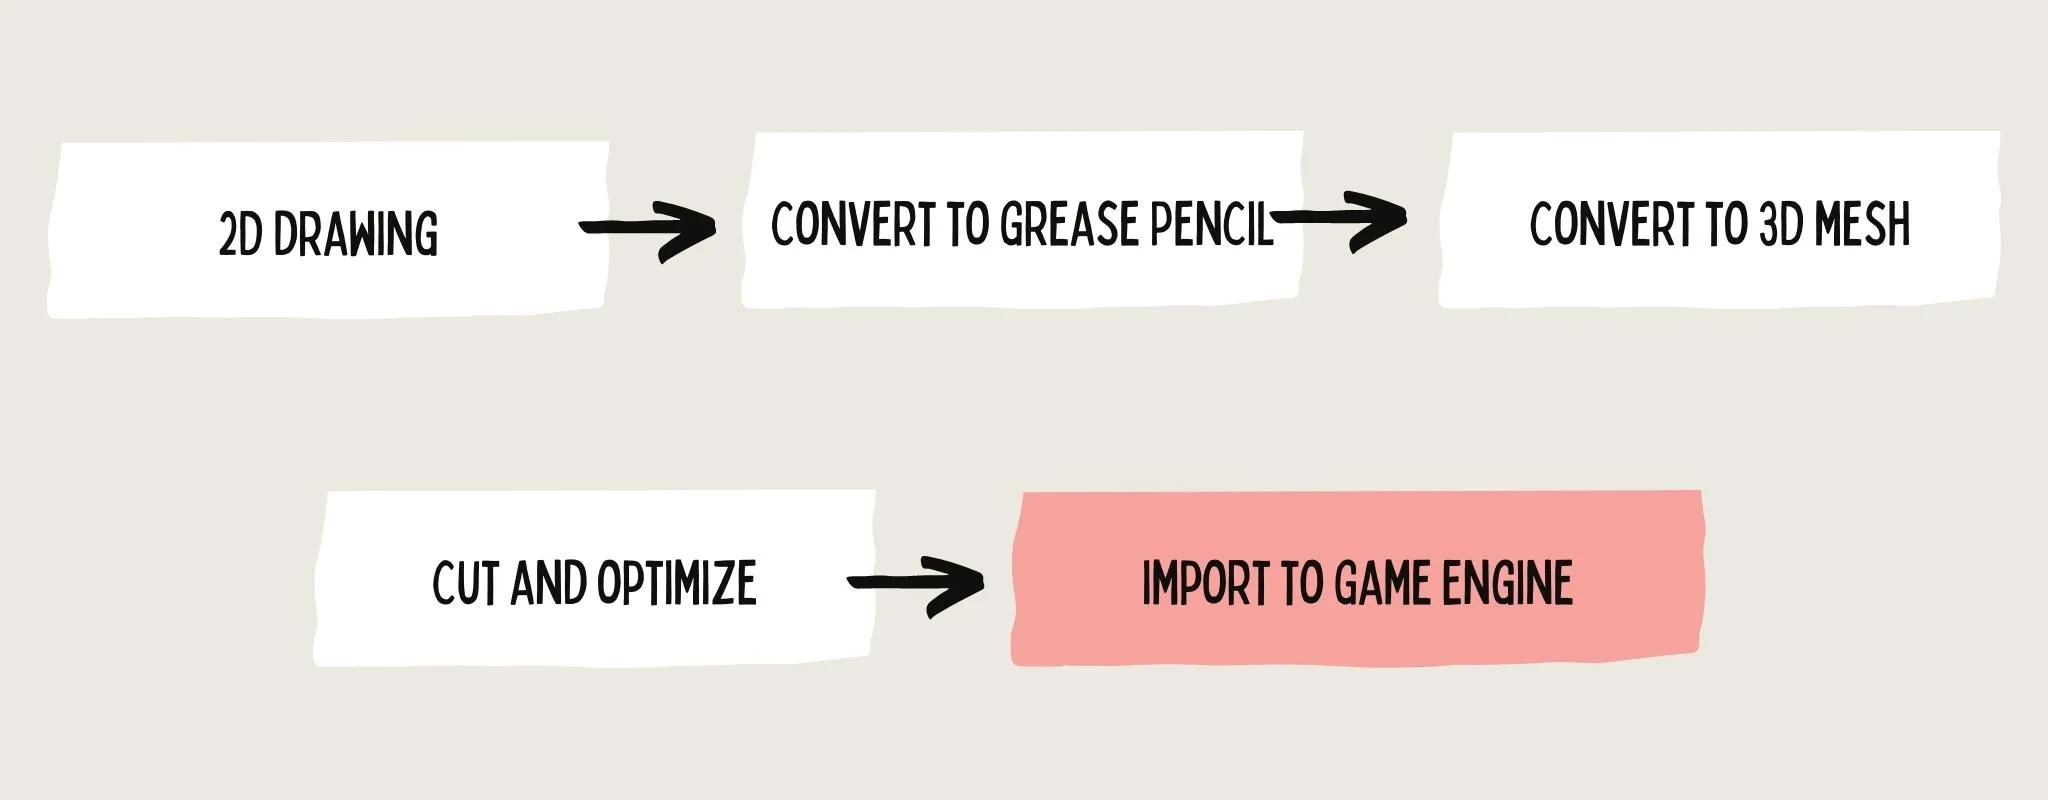
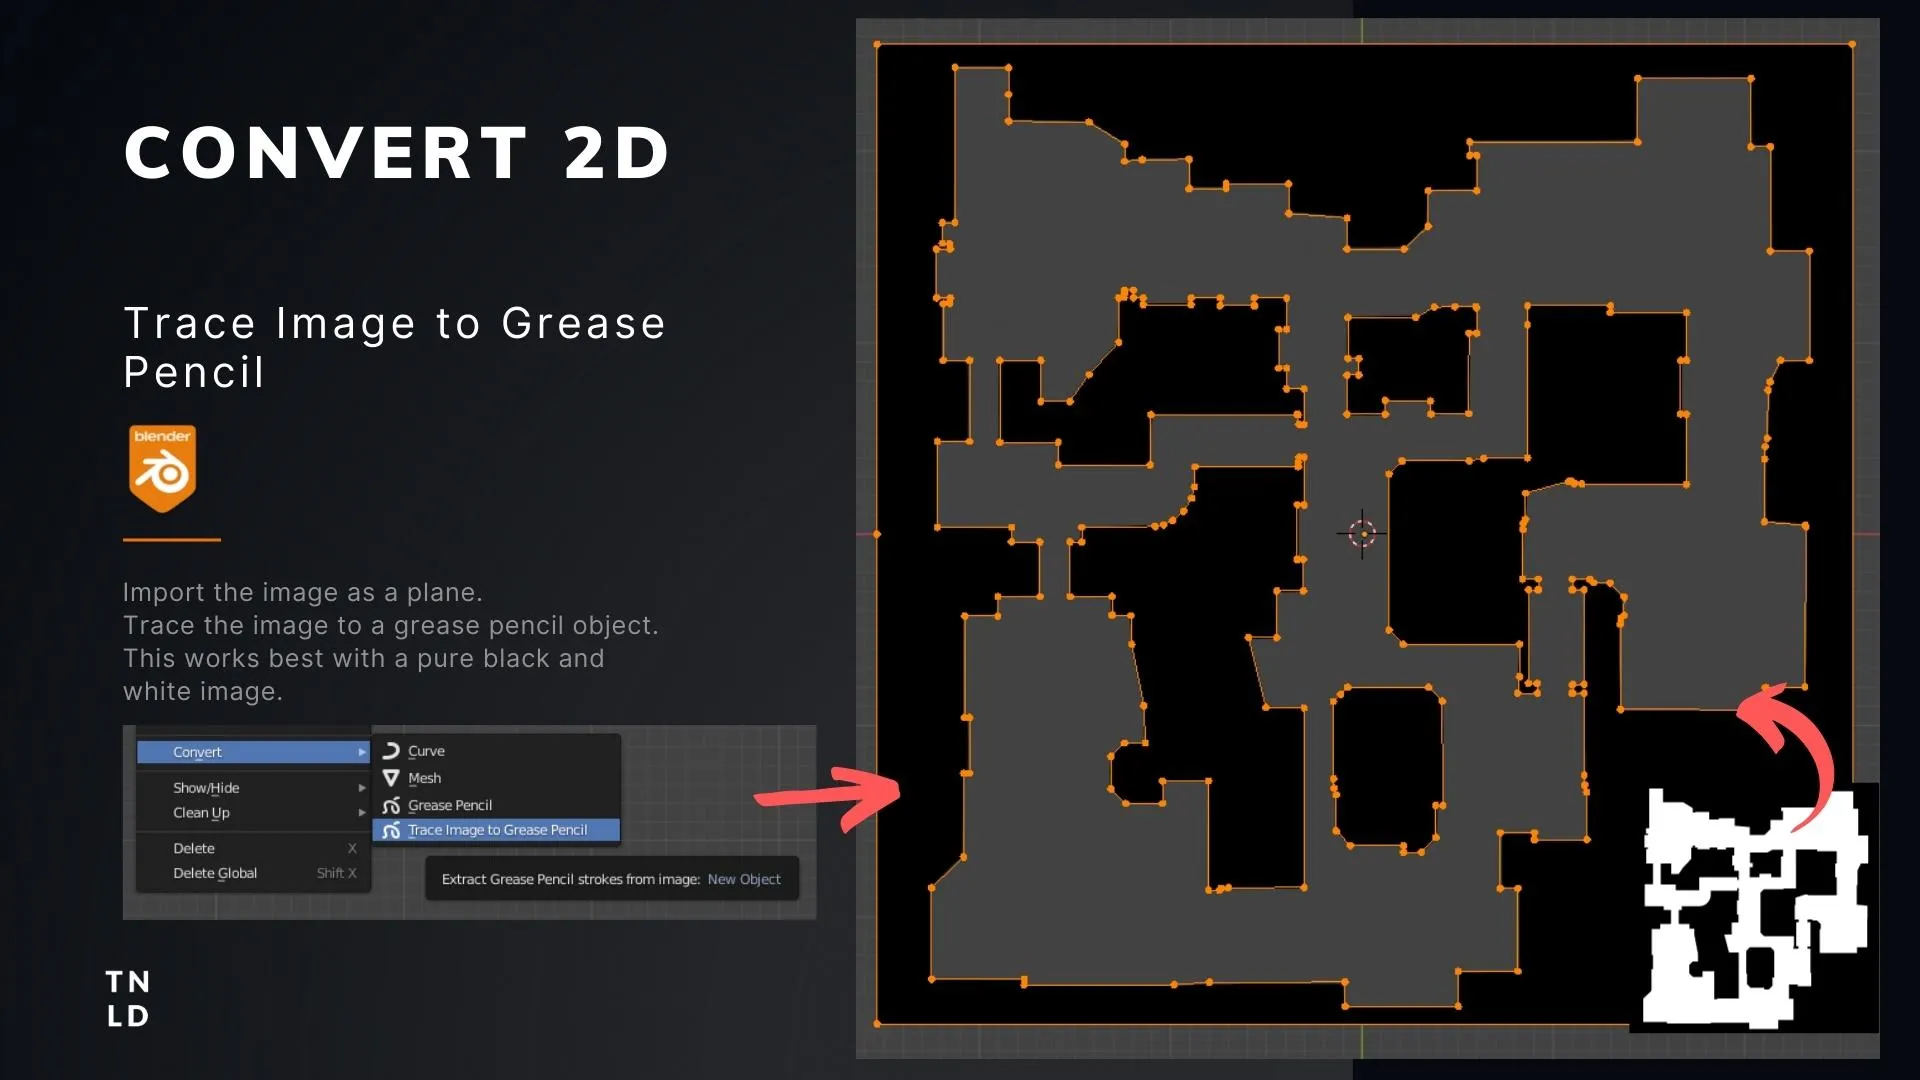
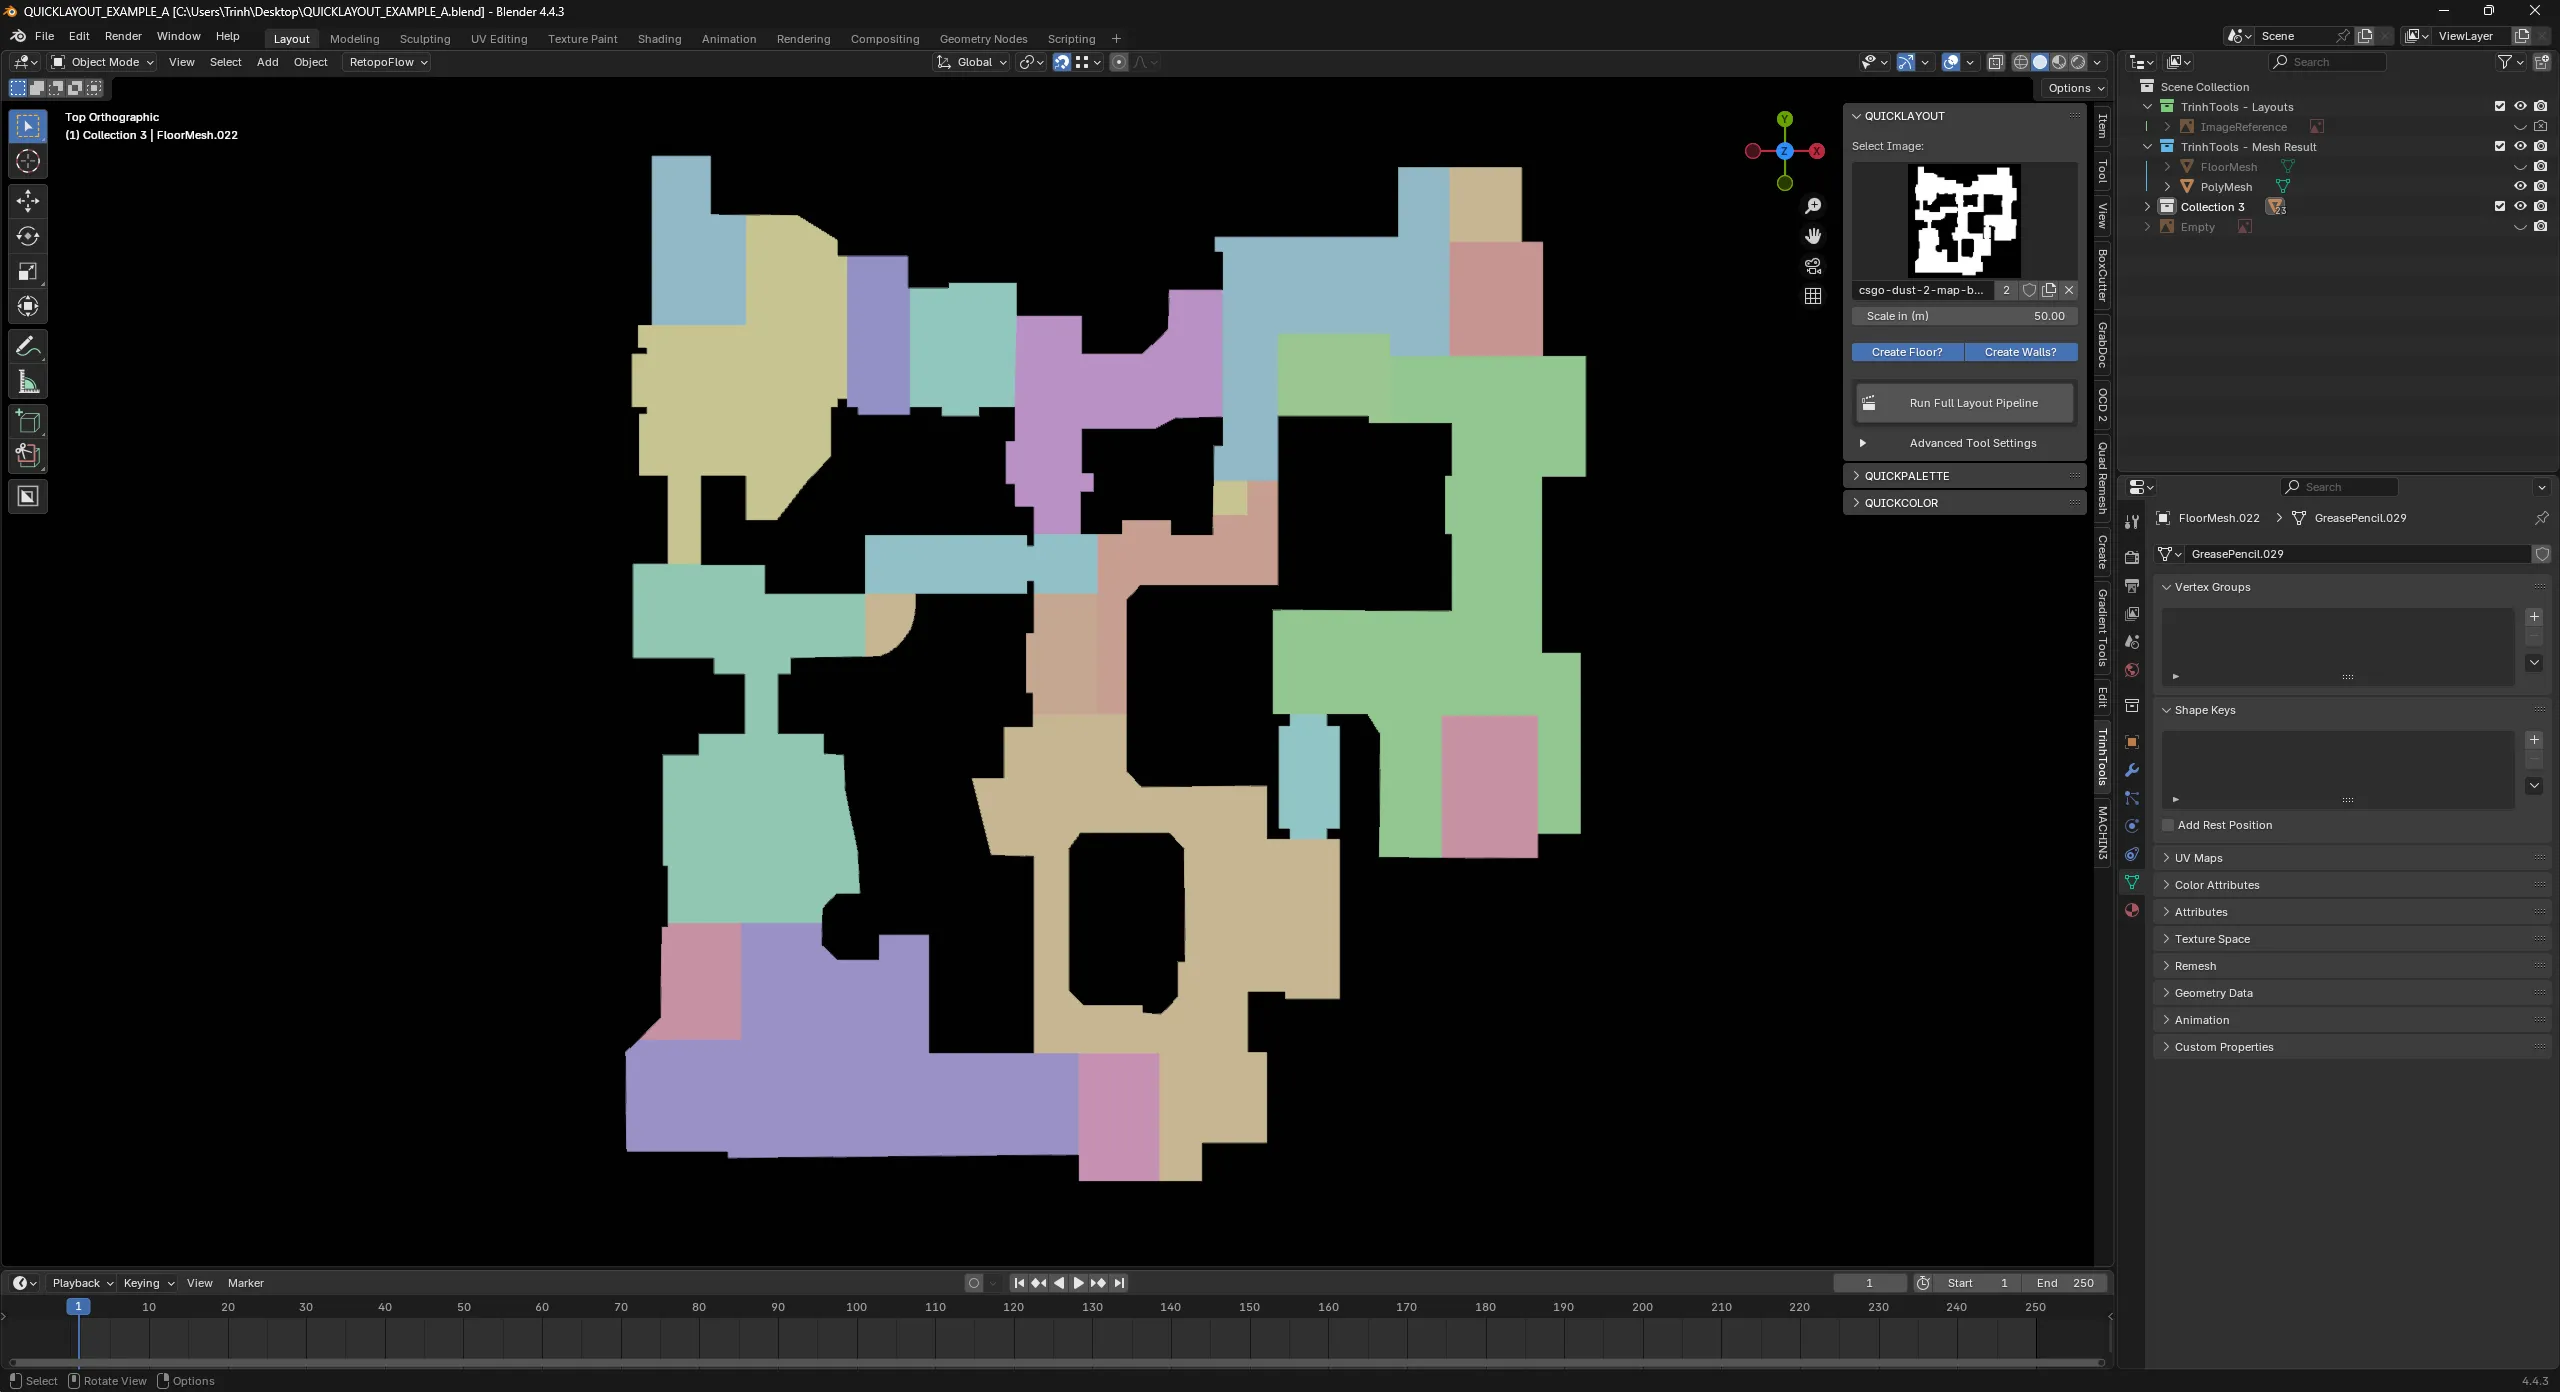
After that we can import the sketch into Blender, where we will use the "Trace Image to Grease Pencil" function. This will allow us to turn a 2D image into an object that exists in 3D space and eventually convert to a 3D polygonal mesh as well. When we converted it to a polygonal mesh, we can use standard modeling techniques to clean it up and fill in the faces.
At this stage, you can already export it to your game engine and test out the layout in its most basic form. But if you wish to bring it to the next level, you can add additional layers to this by adding verticality. Something that I like to do is to use the knife tool to cut shapes and extrude them to create these vertical elements. It will make your layout less flat and more interesting.
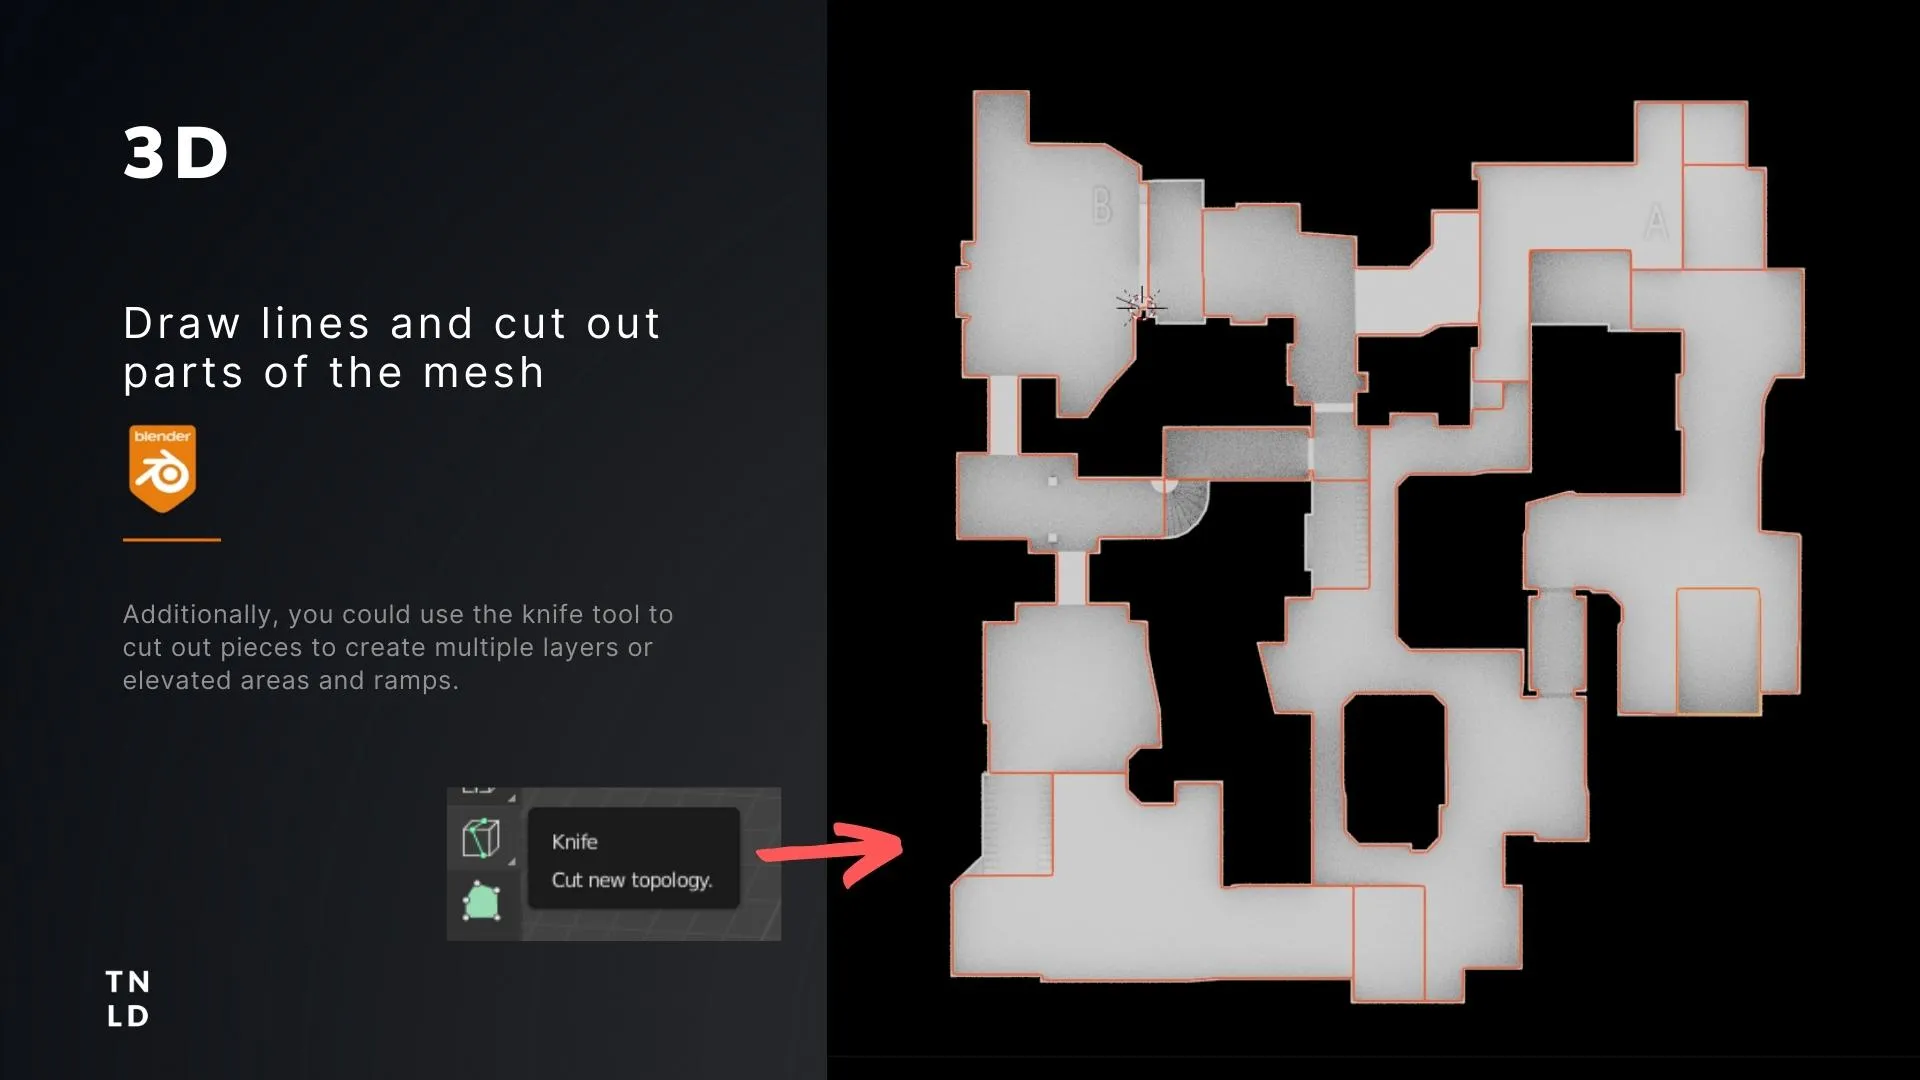
An alternative to use the knife tool would be to make sure your separate the rooms or areas into layers inside of Photoshop or the tools you are using to draw your layouts. This way you can import them one by one, generate the areas and overlay them on top of each other.
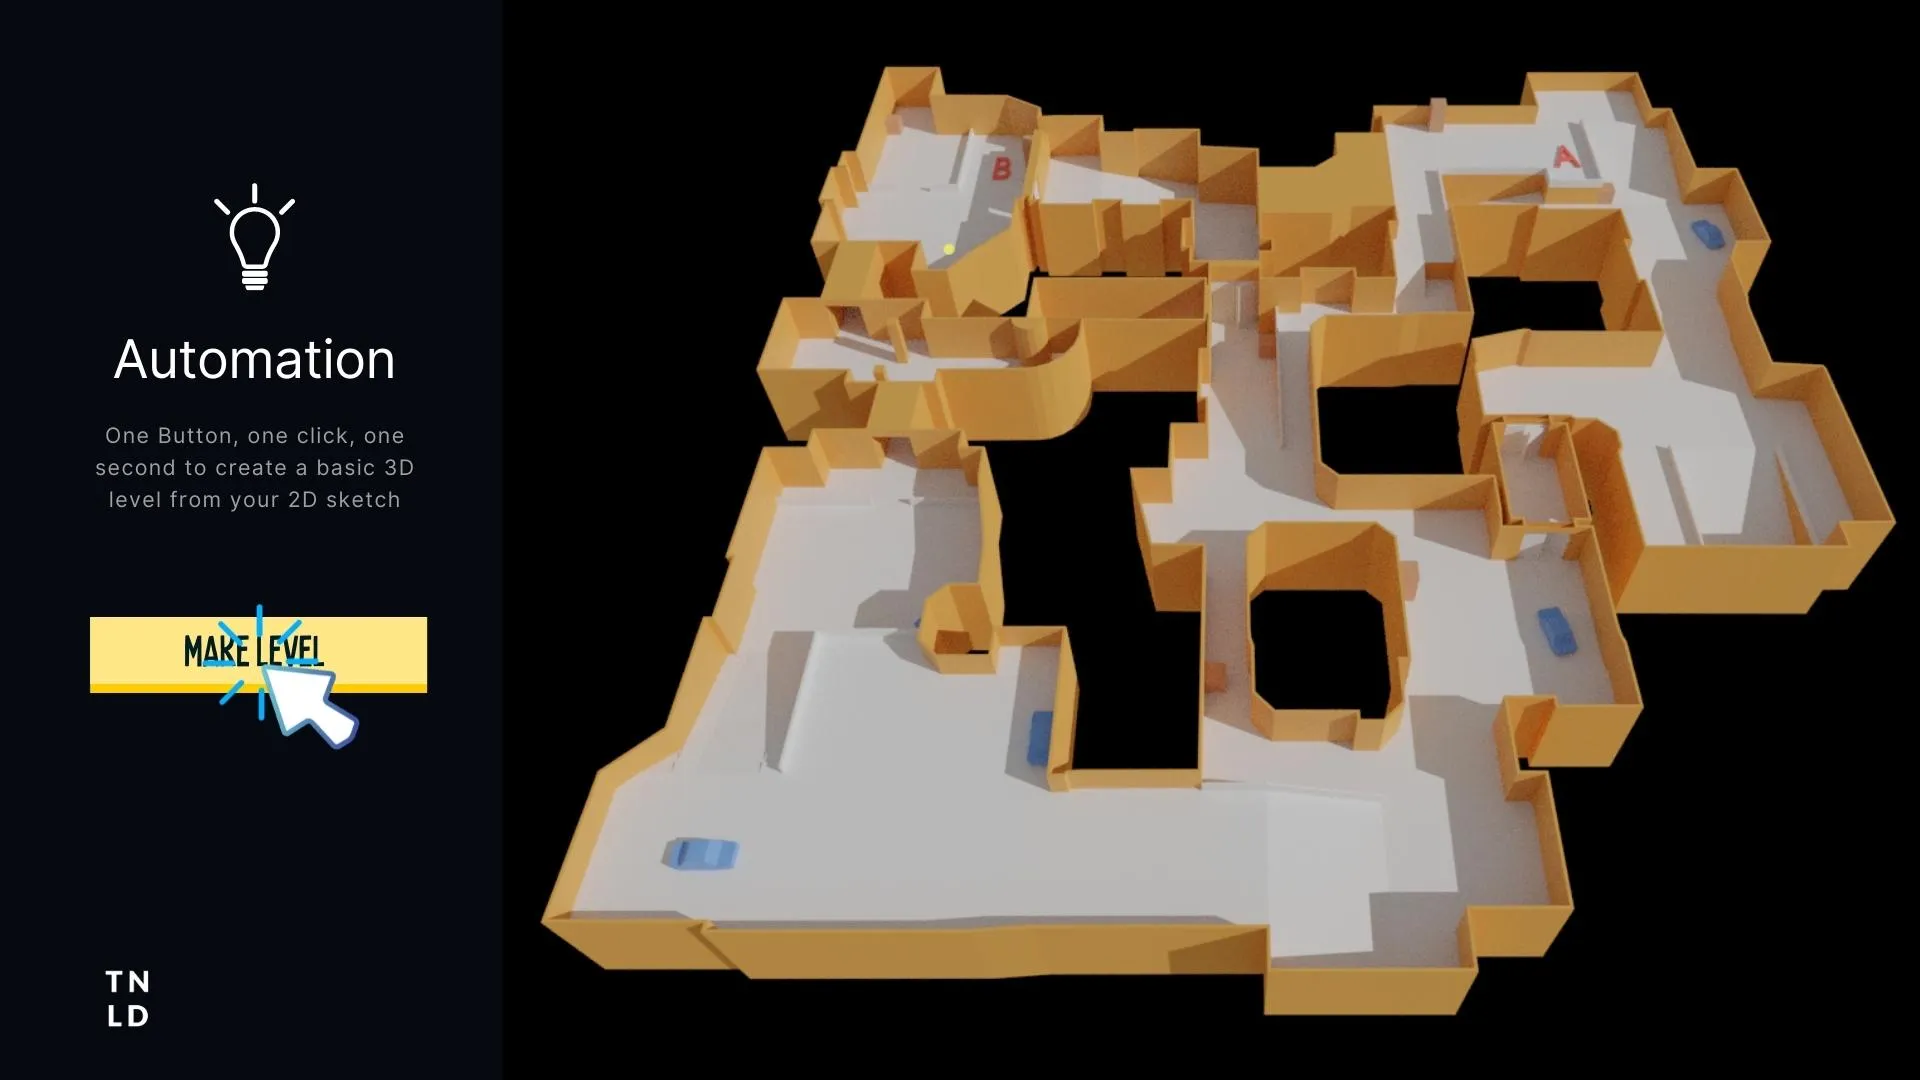
All this work is cool and it works, but it might become very repetitive if we create a lot of sketches. This is not my goal with this workflow. The workflow should avoid boring repetitive tasks and actually save us time, to give us more time to do iterations. This is why automating it would be wise. A python script inside of Blender to automate all the steps we just showed. I want it to be as simple as, importing the image → press make level → create 3d layout.
"Tools like PROTO:LAYOUT streamline the entire process of turning 2D sketches into usable 3D level geometry in Blender, saving hours of manual tracing, modeling, and cleanup. So designers can focus on creativity instead of repetitive tasks."
Meet PROTO:LAYOUT a tool I made with Python. PROTO:LAYOUT is a Blender plugin that instantly transforms 2D sketches or images into clean, usable 3D blockouts, complete with walls and floors so you can prototype levels or environments in seconds instead of hours.
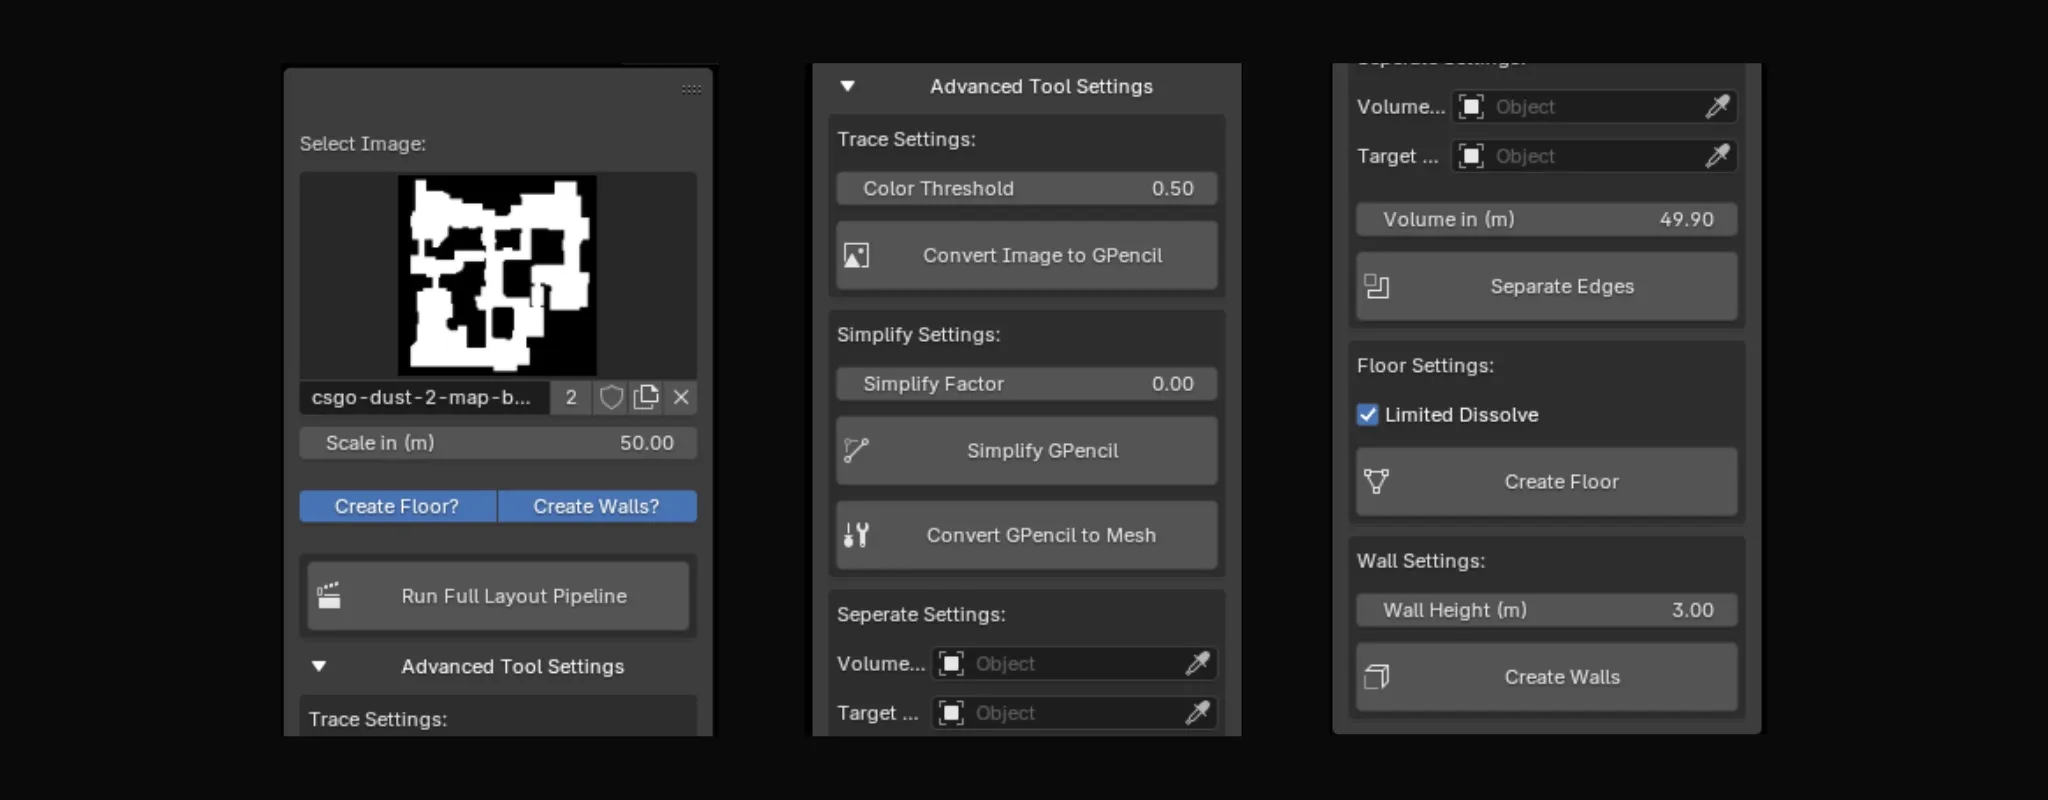
This tool was the final piece to finalize my workflow. A simple tool that allows us to import an image and with a single click generate us a playable 3d layout, ready to be exported to your game engine of choice.
This is a snippet down below is a script for PROTO:LAYOUT. Where we convert the selected Grease Pencil to a polygonal mesh
1class IMAGE_OT_ConvertGPencilToMesh(bpy.types.Operator):
2    bl_idname = "object.convert_gpencil_to_mesh"
3    bl_label = "Convert GPencil to Mesh"
4    bl_description = "Convert selected Grease Pencil to curve and then to polygon mesh"
5
6    def execute(self, context):
7        gp_obj = None
8        for obj in context.selected_objects:
9            if obj.type == 'GREASEPENCIL':
10                gp_obj = obj
11                break
12        if not gp_obj:
13            self.report({'ERROR'}, "No selected Grease Pencil object found.")
14            return {'CANCELLED'}
15
16        bpy.context.view_layer.objects.active = gp_obj
17        bpy.ops.object.convert(target='MESH')
18
19        trace_obj = None
20        for obj in bpy.context.scene.objects:
21            if obj.name.startswith("Trace") and obj.type == 'MESH':
22                trace_obj = obj
23                break
"It should be easy to create the 3d layout and import it inside of the game engine, the easier the better. This way we can playtest the changes and make quick iterations if needed. Saving us a lot of precious time"
Currently this workflow is in its testing phases, the proof of concept is there, it needs a bit more research and refinement to automate the process. I personally believe that this could become a very powerful tool for level designers, as it bridges the gap between 2D and 3D. It will allow them to be more efficient and make quicker iterations of their levels that they can playtest easily in engine.
There are questions about scale and metrics. This method is fast and easy, but requires the user to draw their layouts somewhat in metrics. They can do this with use of guidelines and grids. But it is a risk that I would prefer the user not to think about. I already have a new procedural tool in mind that is more akin to a level editor from the early game dev days, where color or number is equal to a 3d mesh. By assigning a tile with a specific value, the tool would spawn in the 3d mesh. This would be great for dungeons and arcade shooter arenas. The great benefit of this method is that you could assign values in the vertical axis, eliminating the constrains that heightmaps and images usually have.
I hope you found this article interesting. I plan to release this tool on the marketplace somewhere in the future. Feel free to follow me on LinkedIn to keep up to date with the tool. https://www.linkedin.com/in/trinhleveldesigner/